The spark zapper
A Static Electricity Discharge Device
Here's a handy little device for your workshop or shack that you can build easily and quickly for a few dollars.
It is interesting to note how things change. I remember when the practice for working on a radio or other electronic equipment was to keep one hand in your pocket, wear rubber-soled shoes, and stay away from anything grounded such as cabinets, wire, metal work benches, etc.
Now we've come full circle. We want everything tied to ground, including our bodies. We want our bodies to conduct and discharge static charges through grounding devices so that we don't destroy the electronics.
The equipment has changed, but the old rules made a lot of sense if you were poking about in a tube transmitter with several hundreds or thousands of volts floating around. Those kind of volts can reach out and grab you, knock you down, or worse, kill you.
We used to be afraid of electrocuting ourselves, and while there is still potential danger in most equipment, our main concern is protecting delicate semiconductors. Today many of these devices can easily be wiped out by a spark generated by combing your hair. In fact, you do not even have to have a noticeable spark to damage some of these devices. Static charge of less than 3,000 volts is hardly noticeable, and while you do not see or feel them, small charges of only a few hundred volts can easily damage today's equipment. Sometimes I have had bad dreams about ruining my expensive radio equipment just by touching the circuit boards with my fingers. Walking across a carpet on a low-humidity day can generate a 35,000 volt charge, and just wiggling your rear around on your work-chair cushion may generate up to 10,000 volts. So the order of the day is protect it or lose it.
Recently, the need to add another card to my computer got me to think about protecting it from accidental damage by static electricity. My first thought was to go to the nearest electronic-supply house and check out the cost of conductive wriststraps, conductive mats, and the like. But then I decided to see if I could use some existing junk in my shack to remedy the situation. This led to the construction of the "Spark Zapper."
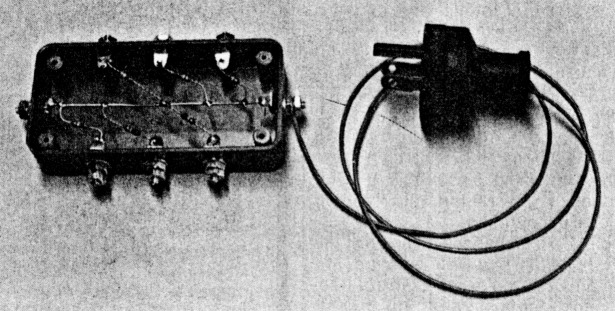
The finished Spark Zapper. The ground wire is connected via the ground pin in the AC outlet, only after you have checked and measured that it does indeed go to ground.
Circuit Description
The circuit of the Spark Zapper is very simple, as can be seen from the diagram. Advertising literature for professional devices suggests that wrist straps, foot mats, etc., have a resistance of around 1 megohm. This led to the selection of that value for the resistors in my circuit. Actually, the value is very noncritical. You can use anything from 100 K to 10 megohms. The box in the accompanying photographs is built with ¼ watt, 100 K ohm resistors because I happened to have plenty of them. Values less than 100 K may allow hazardous currents to flow, and anyting more than 10 megohms starts to become ineffective. Two terminals are provided for the main ground bus, and the other terminals have series resistors tied lock to the bus. Any number of resistors and terminals may be used.
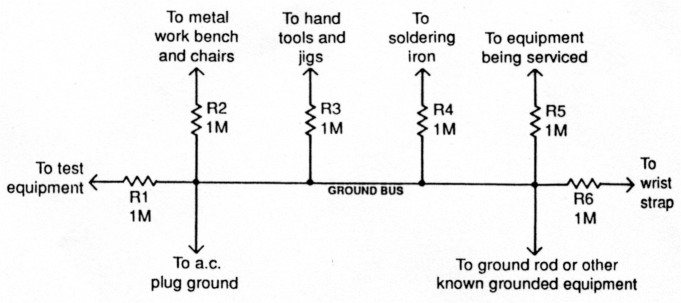
Fig. 1 - Schematic diagram for the Spark Zapper. R1 through R6 are 1 megohm resistors (see text). Any number of resistors and terminals may be used.
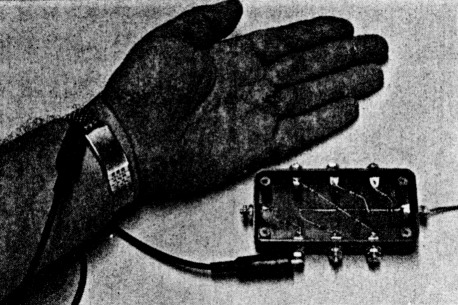
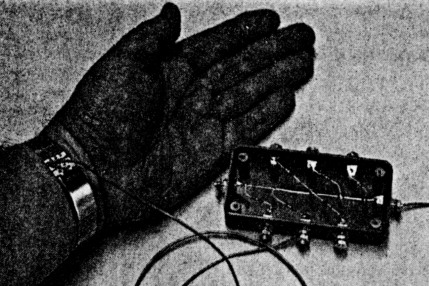
Two methods of connecting the wrist strap to the Spark Zapper. On the left is shown an ordinary clip lead, and on the right a few turns of hookup wire are wrapped around the strap.
Construction
The Spark Zapper is built in a Radio Shack a270-220 plastic box which measures about 4" x 2" x 1". The terminals are number 6 x 32 x %" long screws with two nuts for each screw. One nut is used for mounting and the other forms a convenient screw-down terminal for attaching wires. The screws also have enough length for easy use with clip leads.
Be careful with a soldering iron around plastic boxes. I soldered the resistors to the solder lugs outside the box to avoid melting the plastic and then did the final mechanical assembly. A piece of #18 solid wire forms a convenient bus down the center of the box.
Using the Spark Zapper
Important: Unplug and disconnect equipment to be worked on. You don't want to be tied to a piece of live equipment with a wrist strap. BE SAFE.
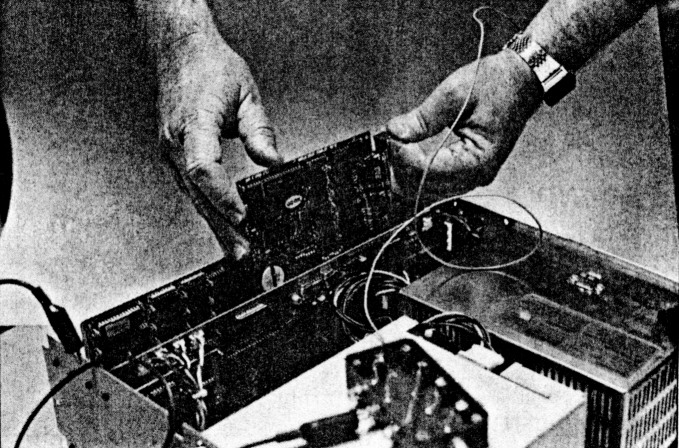
Using the Spark Zapper to change an IC.
Before using the Spark Zapper you need to check your grounds to make sure they really are ground. Use a VOM to check your work-bench ground against a ground rod or other known source. First check for floating AC voltage and then check for a good low resistance connection. I use the third or ground pin on the AC receptacles of my work bench for a convenient ground connection. A single wire to the ground pin of a 3-pin AC plug makes a simple and easy connection for the Spark Zapper. If you use this arrangement, please make sure that you have wired the plug correctly and DO NOT TAKE CHANCES. Check your wiring with your VOM. DON'T plug yourself into the hot side of the AC line.
Once you have made the ground connections to the Spark Zapper box, you can then connect any other needed equipment. Suggested items to be connected are metal work benches and chairs, soldering irons, tools, test equipment, wrist straps, foot mats, the equipment to be serviced, etc.
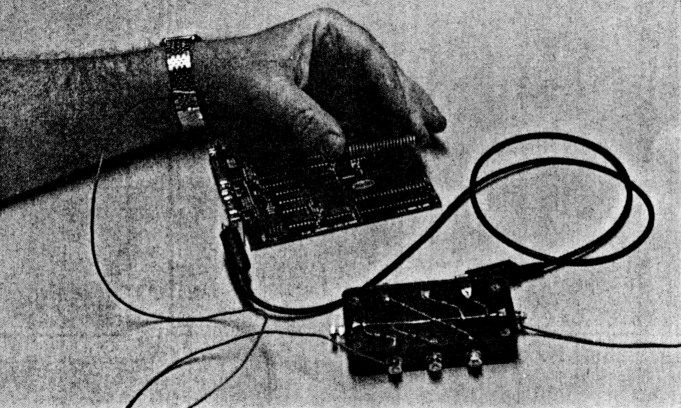
Many soldering irons have a 3-pin plug for grounding at the AC socket. If yours does not have this, connect the metal barrel of the iron to the box with a clip lead. I also connect my VOM to the box. The obvious homemade wrist strap is my own wrist watch. You can connect it with a clip lead or wrap several turns of stripped stranded wire around it. I like the stranded-wire arrangement better because clip leads tend to slip off when moving around. A good way to keep your tools at ground is to put them in a pie tin and connect the pie tin to the Spark Zapper.
Have fun with the Spark Zapper. Use it carefully and you won't zap your equipment or yourself.
Using the Spark Zapper when working on PC boards.
W4WYV, George S. Peacock.